Sagging Ceilings

All too often we see plasterboard ceilings that have noticeably come away from their fixings.
Manufactured on a continuous production line, plasterboard is comprised of a specially formulated gypsum core encased between heavy duty paper liners.
Plasterboard is normally fixed to framing using a combination of stud adhesive and fasteners or in older ceilings screw or nail fixed only.
It is critical to understand that stud adhesive on its own DOES NOT constitute a fixing system and MUST be used in conjunction with screws or nails.
The combination of an adhesive and a fastener is the preferred option for general applications as nominated in the USG Boral Plasterboard Installation Manual (October 2016).
The manual clearly states that on High Shrinkage timbers a combination adhesive/fastener system MUST be used. High shrinkage timber is defined as Timber with moisture content at or above 16% at the time of lining and a tangential shrinkage of more than 8% is categorised as high shrinkage timber.
This generally includes timbers such as Mountain Ash, Messmate, River Red Gum, Alpine Ash, Karri and Blackbutt (commonly referred to as Builder’s, or OB, Hardwood).
Reasons for Plasterboard Ceilings to Fail
The fixing system on a plasterboard ceiling can start to fail for a number of reasons, including:
- incorrect original installation
- extra load being placed on the plasterboard in the ceiling cavity above
- excess moisture, causing the paper around the fixing to give way
Unfortunately poor workmanship is impossible to identify until the fixings start to fail. The reason being the strength of the entire fixing system relies on the correct application of adhesive and fixings. It is is impossible to check the correct application of adhesive once the ceiling is in place.
Key Points
Weight: A 6000mm sheet weighs over 50kg
Adhesive: Without correctly applied stud adhesive, screws and/or nails are unable to hold the weight over an extended period of time.
Once one goes: As soon as one nail or screw fails, this puts more weight on the surrounding fixings, and over time they too will fail.
There she goes: The sagging or downward curving of the sheet is the ceiling slowly falling down.
Signs a Fixing System is Failing
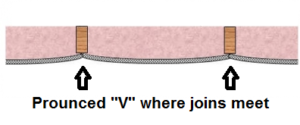
An obvious sign that a fixing system has given way is the ability to see a pronounced ‘V’ where the plasterboard sheets meet or join. This can be caused by the fixings in the centre of the plasterboard sheets letting go.
A simple test that can be completed quite safely is by pushing the plasterboard ceiling up towards the ceiling timbers. If the plasterboard moves upwards or if the screws or nail heads become visible or pop through the surface, this clearly shows there is a gap between the timber and plasterboard and the fixings have already started to let go of the plasterboard.

Please Note: when completing this test, be careful to gently ease the sheet as comes back down. If the fixings have given way this will minimise the pressure on the sheet and any fixings that are still intact and holding the sheet in place.
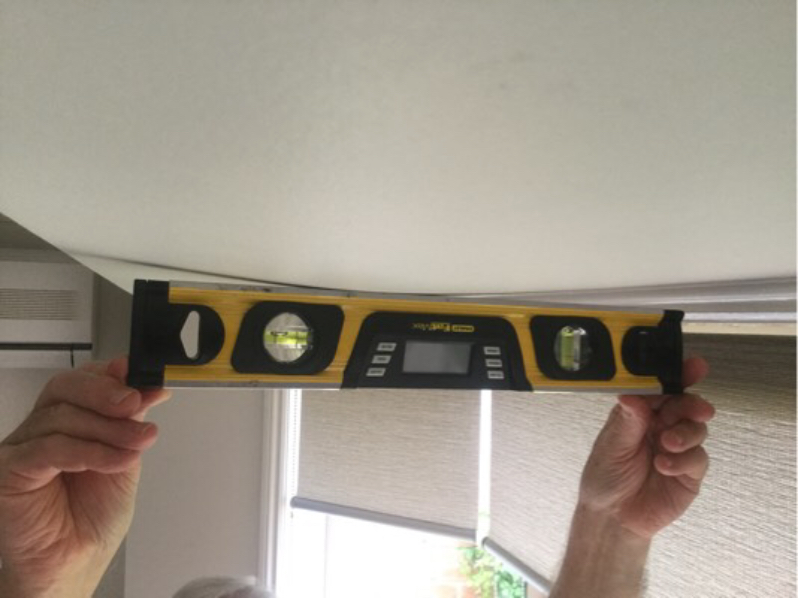
If the ceiling is at the stage where a noticeable curve is present, the fixing system has failed and should be repaired as soon as possible.
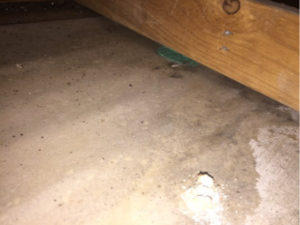
In the above image you can see how far the ceiling is from the edges of the level but is touching in the centre.
Repairing the Ceiling
There a number of options to repair a plasterboard ceiling that has sagged.
Often the preference is to drop the old ceiling and replace it with new plasterboard and cornice because these works are easily able to be warranted. However there are other options depending on the extent and timeframe from when the fixings started to fail.
Option 1 – Total Ceiling Failure
This option is to be undertaken when the the ceiling sheets have become distorted due to length of time the sheet has been curving down and or if the majority of fixings have failed. If this is the case the old plasterboard ceiling and cornice will need to be removed before installing new sheets and cornice.
Option 2 – Minor Failure that has been detected early
If the area affected is relatively small or picked up very early, the plasterboard sheeting can be rescrewed to the ceiling timbers. The sheets should be fixed every 300mm to pull the plasterboard back into place and fix it securely to the ceiling timbers.
Option 3 – Temporary Battens
If the ceiling cannot be pulled back into shape using Option 2, this method can be used if the fixing failure has been detected relatively early. It requires temporary timber battens to the be fixed to the underside of the plasterboard and these are screwed off to the ceiling timbers, supporting the sheets and allowing them to return to their normal flat shape. The battens are required to be left insitu for approximately one week before being removed. As this option requires a longer repair time, material costs for timber battens and labour for finishing and painting, it must be assessed for cost effectiveness because while this retains the original plasterboard, it can be more costly than just replacing the ceiling.
Option 4 – Sheet over the old ceiling
It is also possible to replace the ceiling by leaving the original sheeting in place, installing permanent timber or metal battens under the old sheeting and installing a plasterboard underneath.
This method will save time, mess, allow the existing insulation to remain in place and save on dumping fees, however it will reduce the ceiling height by approximately 40mm and therefore may not be option depending on the building design.